Version: 8.3.0
To create a Local Coordinate System in the Main Menu select New Entity - > Basic - > Local Coordinate System
There are three algorithms to choose from.
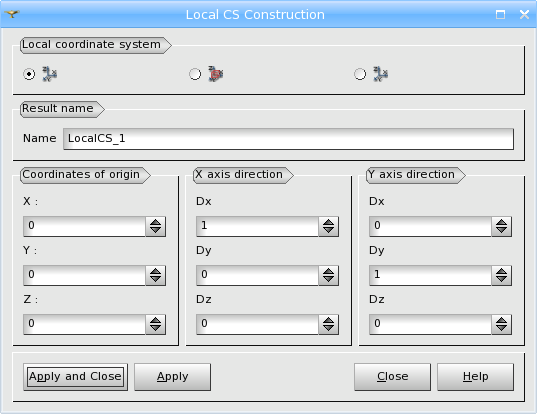
Firstly, you can define the values of X, Y, and Z coordinates of origin and the directions of X and Y axes directly in the menu.
TUI command: geompy.MakeMarker(OX, OY, OZ, XDX, XDY, XDZ, YDX, YDY, YDZ), where OX, OY, OZ are coordinates of the origin of LCS, XDX, XDY, XDZ is a vector of OX direction of the LCS and YDX, YDY, YDZ is a a vector of OY direction of the LCS.
Arguments: Name + Coordinates of origin, X axis direction, Y axis direction.

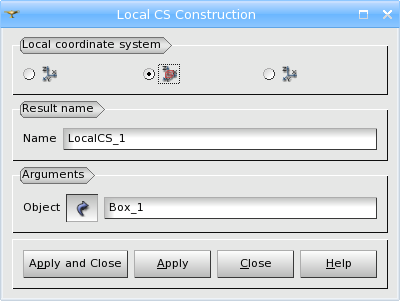
Secondly, you can simply select any object in the object browser or 3D viewer, in this case the coordinates of origin and axes direction of the LCS are calculated automatically basing on the selected object.
TUI command: geompy.MakeMarkerFromShape(theShape).
Arguments: Name + reference object.

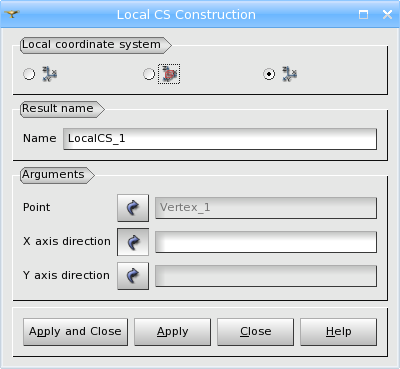
The last algorithm of LCS construction allows to define the coordinates of origin by a point and axes directions by a line or a vector.
TUI command: geompy.MakeMarkerPntTwoVec(Center, VectorX, VectorY) where Center is the origin of the coordinate system, VectorX is the direction of OX axis and VectorY is the direction of OY axis.
Arguments: Name + 1 point of origin + X axis direction, Y axis direction.

Press OK or Apply button to create an LCS at the location with the specified coordinates. The new object is shown in the Object Browser and in 3D viewer.
Example:

TUI Script provides you with a useful example of Local Coordinate System creation.