Version: 8.3.0
SpherePadder is a geometric algorithm that creates a set of rigid spherical particles of different sizes called a "discrete element mesh". The centroid positions of particles are randomly generated by a "disordering" technique described in [1] that provides a polydisperse assembly with a particular size distribution. The spheres are positioned or “padded” into a tetrahedral mesh, which must be generated first. As illustrated below, SpherePadder creates a Discrete Element (DE) assembly in seven steps (see [1] for details):
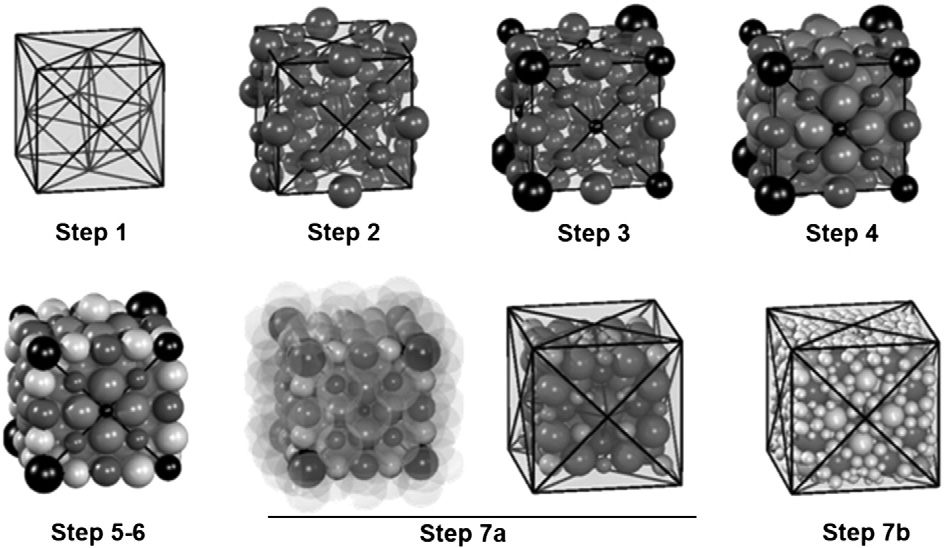
In order to increase the density of the whole packing and to fill spheres in the gaps close to the mesh boundaries (created by removing boundary spheres), SpherePadder detect `void spaces' where new spheres could be added by applying a particular geometric procedure, using tetrahedra resulting from a tridimensional Delaunay triangulation built with the sphere centers. That triangulation is generated by using the CGAL library [2].
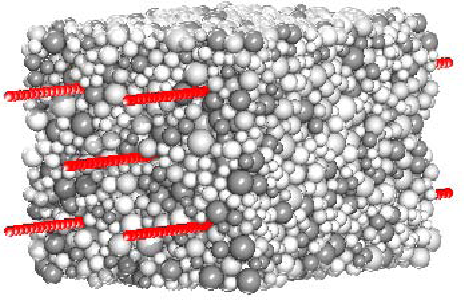
DE meshes generated by SpherePadder algorithm are used in EUROPLEXUS fast dynamics software simulations [3] to model the discontinuous behaviour (fractures, fragmentation) of reinforced concrete structures under severe dynamic loads such as impacts or explosions. The characteristic size of elements does not have to be representative of concrete constituents, such as granulars or cement matrix, since the aim is to reproduce the dynamic behaviour of the simulated material at the macroscopic scale.
To generate DE mesh for a reinforced concrete structure, one should supply a single tetrahedral mesh for concrete and as many segment-type 1D meshes as groups of steel reinforcement bars of different diameters. The size (length) of segment-type steel reinforcement elements should correspond to the modelled bar’s diameter. SpherePadder algorithm will create steel discrete elements by using the segment’s length as the DE diameter.
Warning: The User should control that all steel bars of a given diameter in a mesh belong to the same mesh group, and that different steel bar groups do not use the same diameter.
If steel mesh is not provided, a pure concrete DE mesh is generated.
In MED representation, DE meshes are described by using MED_BALL type structural elements. Each MED_BALL element is defined by its centroid location and a diameter.
Written in C++, SpherePadder is free software licensed under the terms of the GNU General Public License.
Bibliography:
The SpherePadder algorithm is implemented as an external software program. This external program is integrated in the SMESH module as a SALOME plugin that manage the execution of the SpherePadder program from within the SALOME framework. This section illustrates how to use this plugin to create a discrete element mesh.
In this example, we consider a concrete piece with a single reinforcement bars group. Thus, two standard (Finite Element type) meshes have been created and published in the study, the first one named “concrete”, and second one named "ferrail", for the steel bars part:

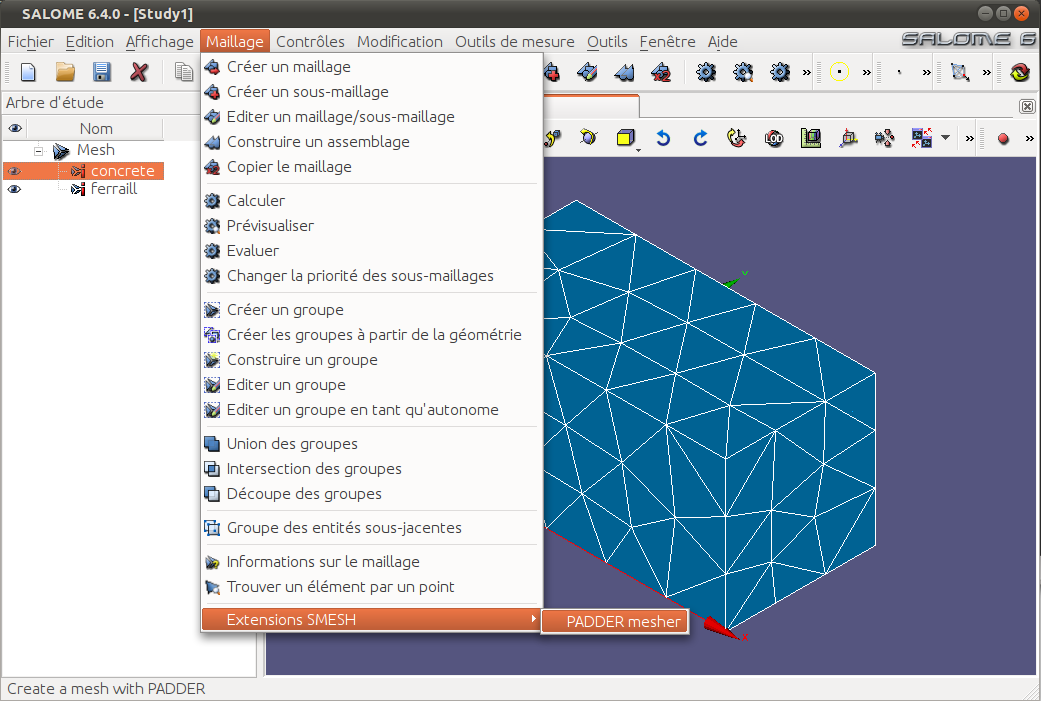
The SpherePadder plugin can be activated in the SMESH plugins menu, as illustrated on the figure below:
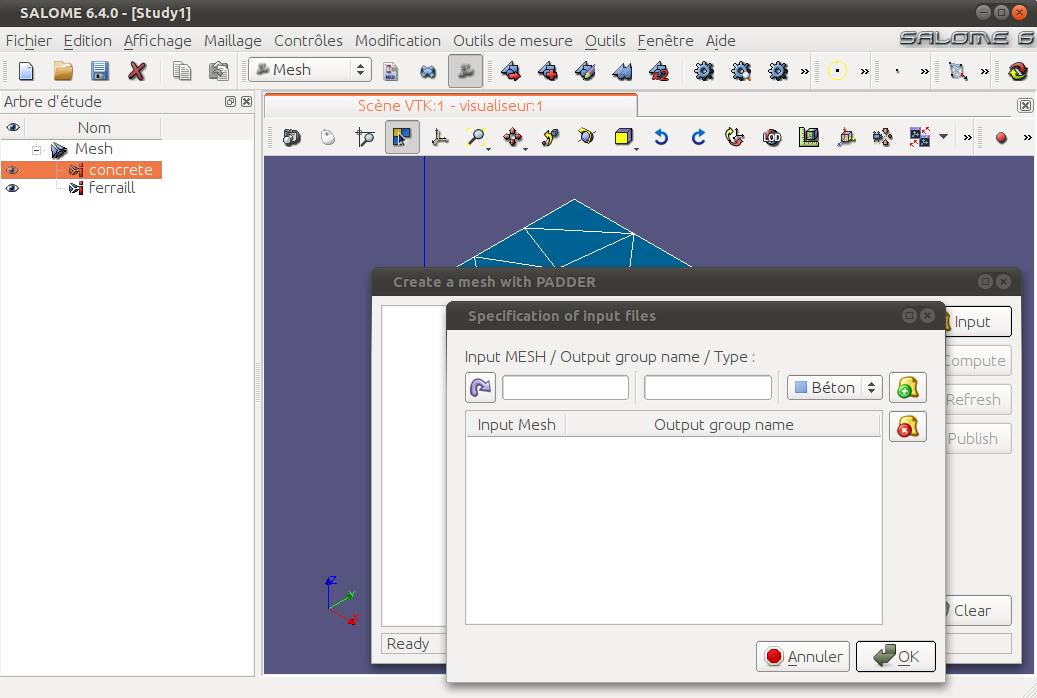
When clicking on the "PADDER mesher" item, the graphical interface of the SpherePadder plugin appears:
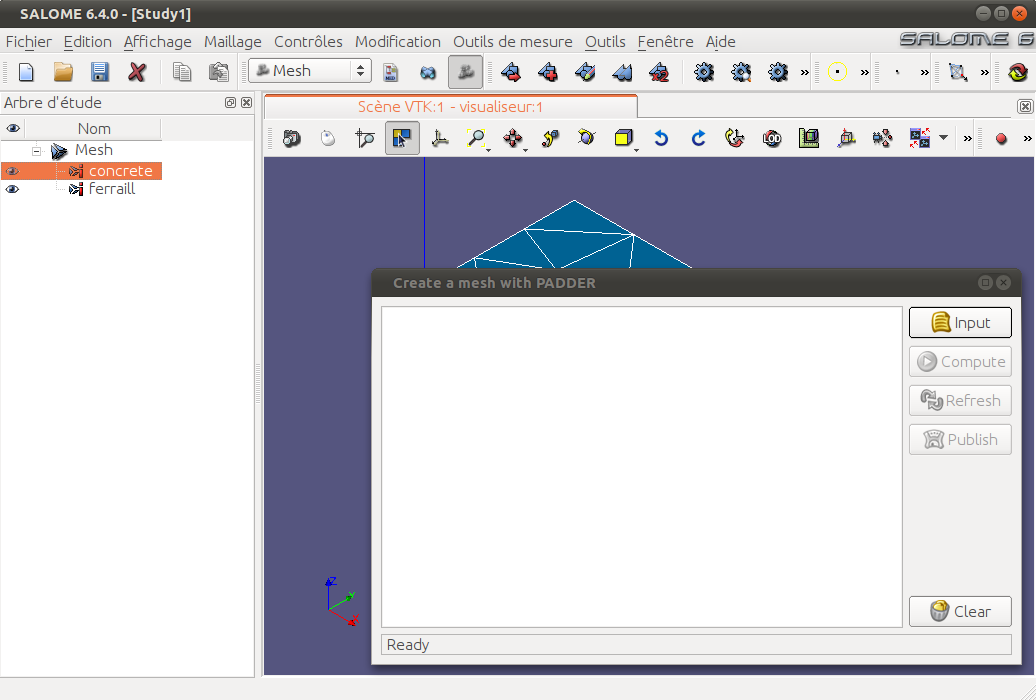
This interface invites you to specify input data by pressing the button "Input". This command opens the Input dialog box allowing to specify the list and the type of selected meshes (to be chosen between "concrete" and "steelbar" using the combobox on the right side of the input line):
In the figure below, the mesh with name "concrete" has been selected in the study and added to the list of the input file as a "concrete mesh". First, you have to choose the mesh in the dialog box using the rounded arrow icon, then specify for this mesh a group name which will be published in the final DE mesh, and finally click on the "Add" icon:
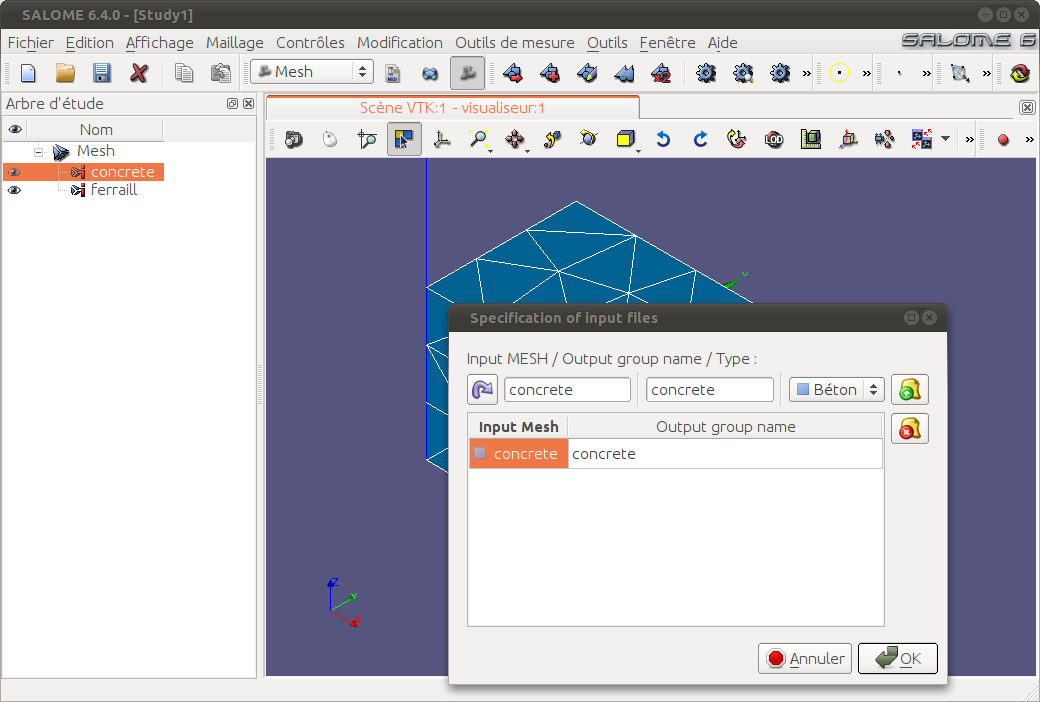
Then, the mesh with name "ferrail" is selected and added to the list as a "steelbar mesh":

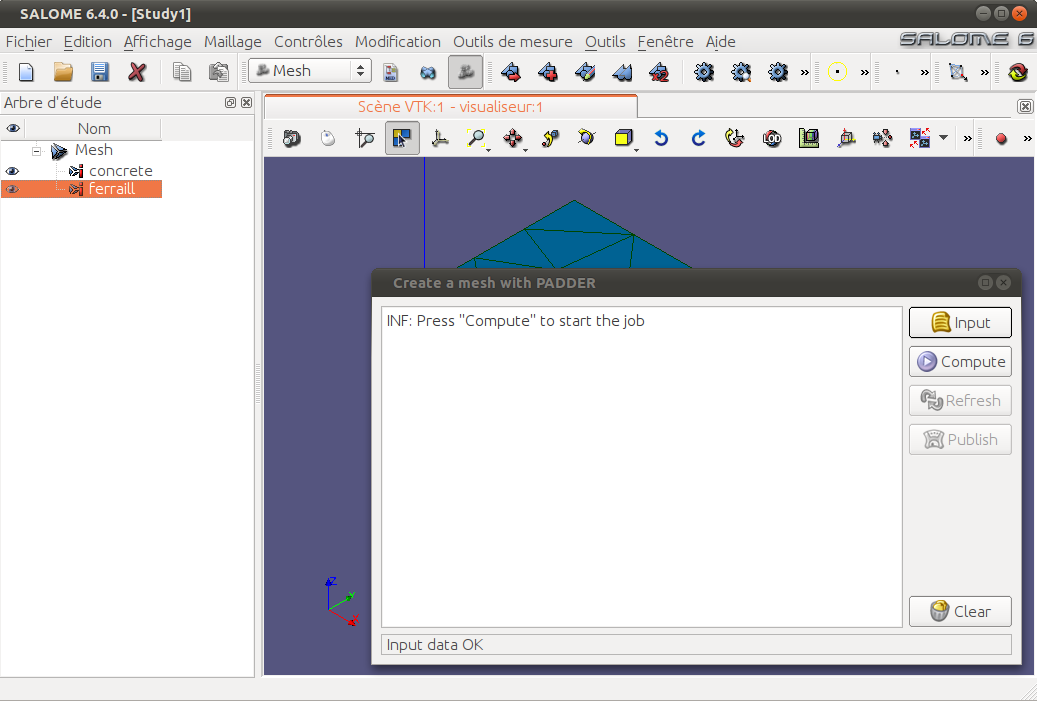
The input dialog box has to be validated to return to the main plugin interface. The "Compute" button is now enabled, indicating that the problem is ready to be computed:
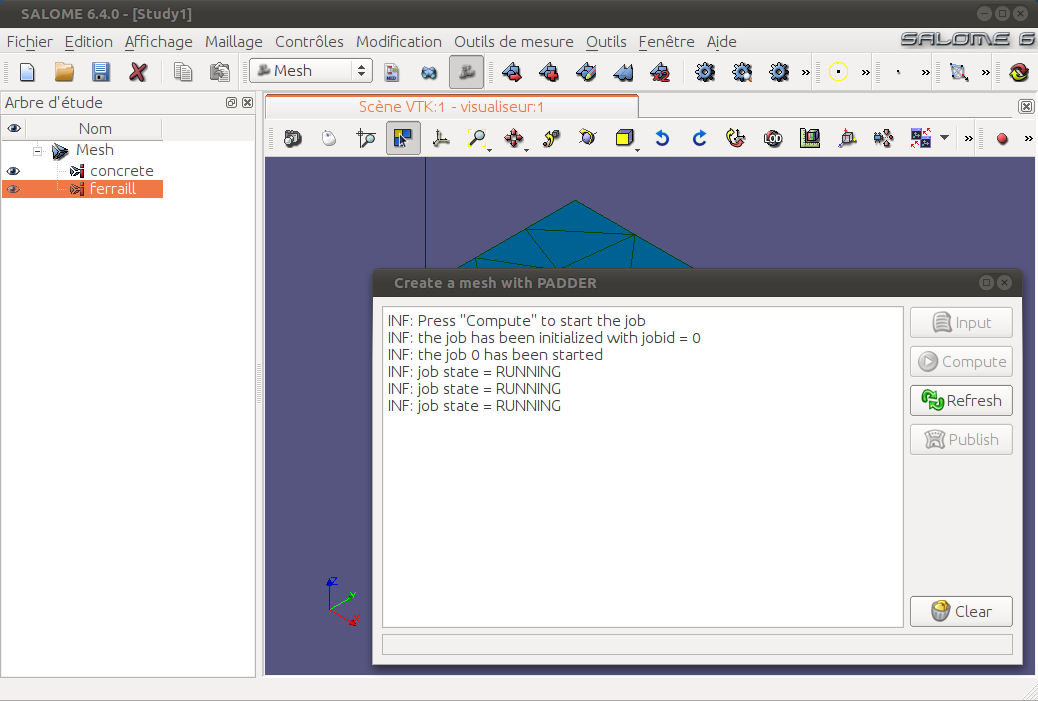
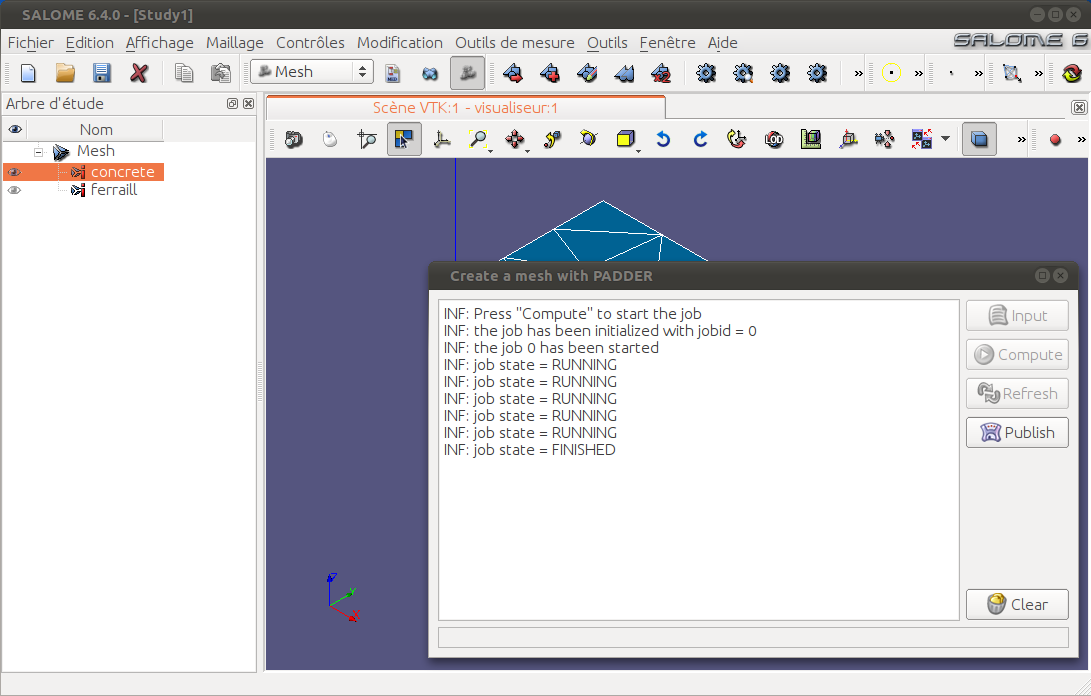
The command "Compute" starts the job run. The progression can be requested using the command "Refresh". In the figure below, the job is still running:
Finally, the job is finished and the result is ready to be published in the SALOME study:
Click on the button "Publish" to import the resulting MED file into SMESH and publish the resulting mesh in the SALOME study:

Note that the final ED mesh contains as many groups as the input meshes. Their names have been specified in the input dialog.
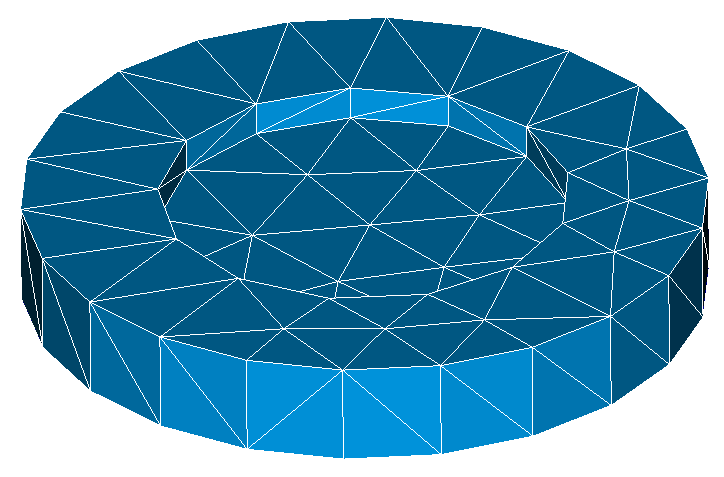
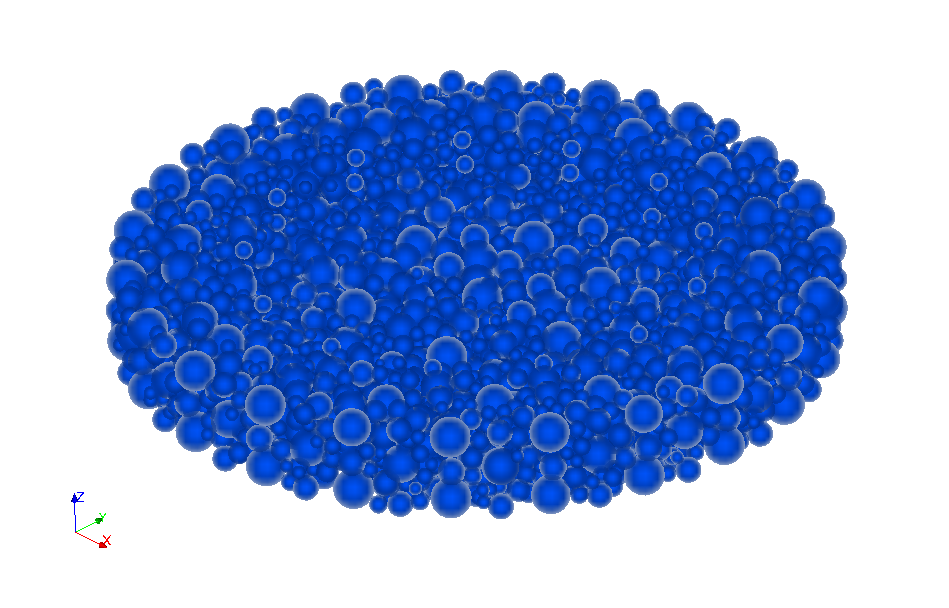
A new functionality has been added to SpherePadder allowing to mesh curved geometries. Circular objects with concave boundaries such as shown here:
can be "padded" with spherical discrete elements. Henceforward, the PointSprite (sphere-like) mode is used to show the MED_BALL elements with their real diameters:
The configuration of the plugin consists in specifying the location of the padder executable program (padder.exe) and its runtime environment file (padder.env). This configuration is automatically done at installation process of the SALOME plateform, on the basis of the environment variable PADDERHOME that localizes the installation root of the SpherePadder external program. This installation process creates a configuration file padder.cfg located in the folder <SMESH_ROOT_DIR>/share/salome/plugins/smesh, where <SMESH_ROOT_DIR> is the installation root directory of the SMESH module.
In the case where you have to specify a different configuration than the generated configuration, you must edit the file padder.cfg. This file defines a list of computing resources, and at least a local resource (a padder program working on your local host), and a remote resource (a padder program working on a remote host):
The resource labels (localhost and nepal in the above example) must correspond to existing computing resources of SALOME. These resources are specified in the SALOME configuration CatalogResources.xml, located at the root directory of your SALOME application. The resources catalog is supposed to contain at least the localhost resource of type 'ssh' defined as follow:
Note that these SALOME computing resources can be graphically edited using the JOBMANAGER module (see JOBMANAGER documentation).
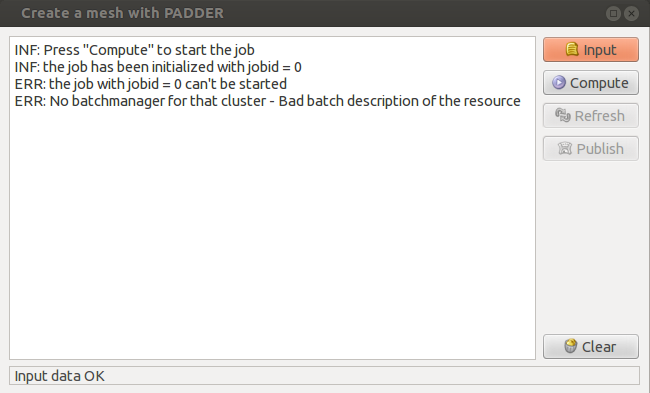
The typical error message when trying to use the padder plugin while the localhost resource is not correctly defined is :
This error message is display in the graphical interface of the plugin when you request a computing of your mesh:
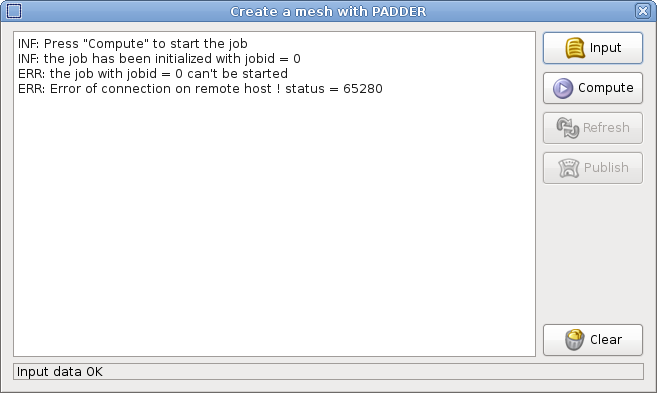
Another typical error when using the padder plugin is due to the ssh configuration between your client host and the execution host:
This error message is display in the graphical interface of the plugin when you request a computing of your mesh:
The underlying batch system for executing padder jobs is based on a ssh communication between the client local host and the execution host (see the protocol specified in the CatalogResources.xml file above), even if the executive host is your local host (i.e. the same as the client host). Then, a ssh connection must be configured so that the underlying batch system could work properly, even between your local host and itself. The configuration could be done using a set of instruction as follow in a shell terminal (see ssh documentation for details):
You can check the configuration by testing that you can connect to the host <hostname> with the login <username> without being asked a password:

