Modification of a schema
Create an object
YACS GUI uses the following approach for creation of all kinds of YACS objects:
- Optionally, the user selects some item (or items) in the Tree View or in the 2D Viewer that acts as input parameter(s) for creation.
- Then the user activates corresponding GUI command to create an object of required type.
- The new object appears in the Tree View and 2D Viewer of a schema. In order to show Input Panel with the property page of a new created object the user should select a new created object in the Tree View or 2D Viewer of a schema. After that the user can modify properties of a new created object via the corresponding property page on the Input Panel.
More detailed information about the creation of certain objects types is given in sections below.
Create a new schema
The YACS module provides the user with capabilities not only for modification, but also for creation of the graphs. The user can create a new schema by calling YACS -> New Schema command from File or from the corresponding toolbar button on the YACS toolbar, no schema loaded.

As a result of this operation, YACS module creates an empty instance of a schema object, new schema object is shown in the Object Browser and the Tree View is created for a new empty schema. The schema object is shown as a root of Tree View structure. Schema root object of the Tree View will be used as a parent for the schema sub-trees and all new objects added to the schema will appear under these sub-trees.
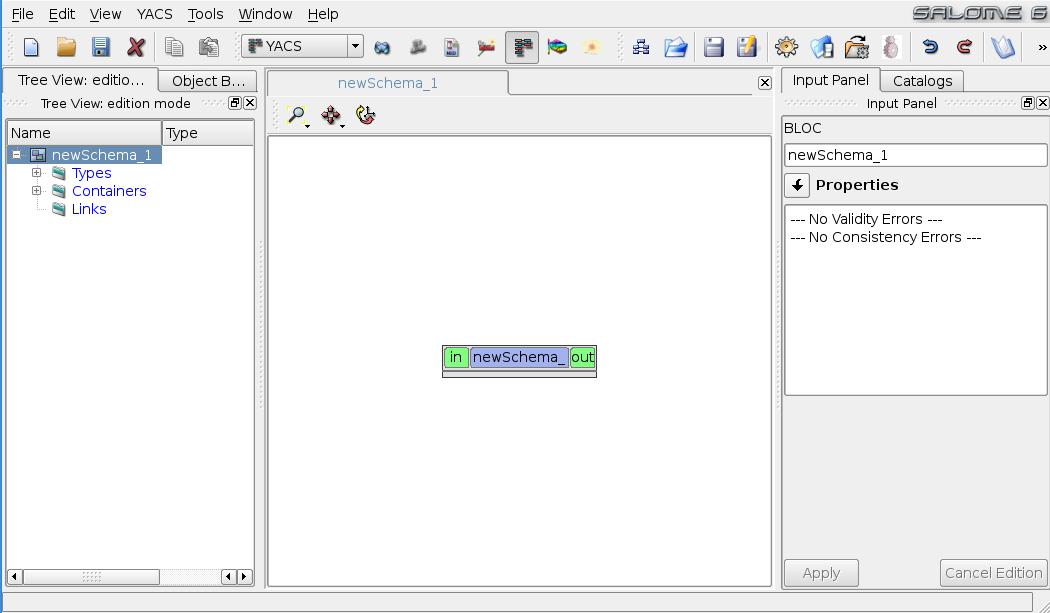
New created schema
New schema object becomes the active one. In order to display Input Panel with schemas’ property page containing properties of the schema the user should select schema root object in the Tree View. The property page of a schema allows the user to modify schemas’ properties (see Property page for schema section).
Create a container definition
To create a container use the command Create container from the context menu of the folder Containers in the Tree View.
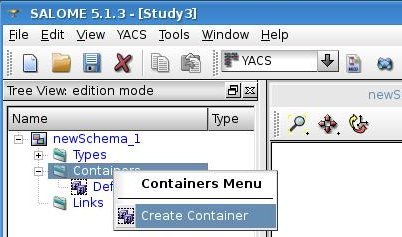
On this command call a SALOME container with a default name and default machine parameters is created.
As a result of container creation, YACS module creates a new container definition object and shows it in the Tree View under ‘Containers’ folder. It is used as a parent item for all component instances created in this container.
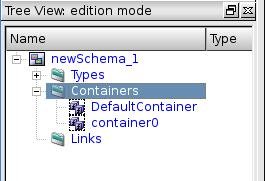
As soon as user selects a container object in the Tree View, Input Panel containing property page of the selected container is shown (for the sample of the property page see Property page for container section) and allows the user to modify its properties. In the container property page the user can specify parameters of a created container object, such as the name of the container and machine parameters.
Create a component instance definition
At the current moment YACS module does not provide a functionality to create directly component instance. The component instances are created indirectly when nodes are created (see Create a node).
When a component instance is created (following the creation of a node), a new SALOME component instance definition is shown in the Tree View under its container object.
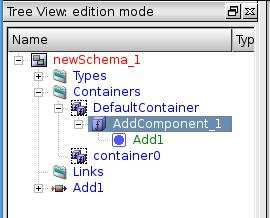
As soon as user selects a component instance definition in the Tree View, Input Panel containing property page of the component instance definition object is shown (for the sample of the property page see Property page for component instance definition section).
Create a node
YACS module provides the user with a specific GUI command for creation of each type of node.
At the current moment in the frames of the YACS module the user can create nodes of the following types:
Inline function
The node object can be created with help of Create Node –> Inline Function Node command from the Tree View context menu
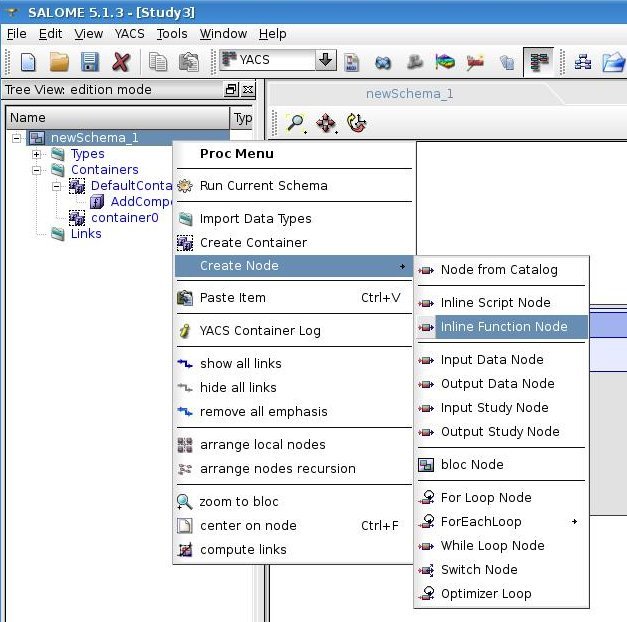
or from the 2D Viewer context menu. The context menu must be activated on the chosen parent node.
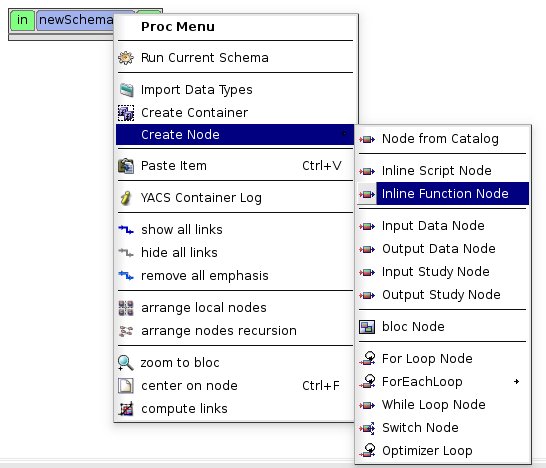
as a result:

Example of inline function node with ports
Now, if you want to modify the settings of this node, use the associated panel Property page for inline nodes.
Inline script
The node object can be created with help of Create Node –> Inline Script Node command from the Tree View context menu or from the 2D Viewer context menu. The context menu must be activated on the chosen parent node.
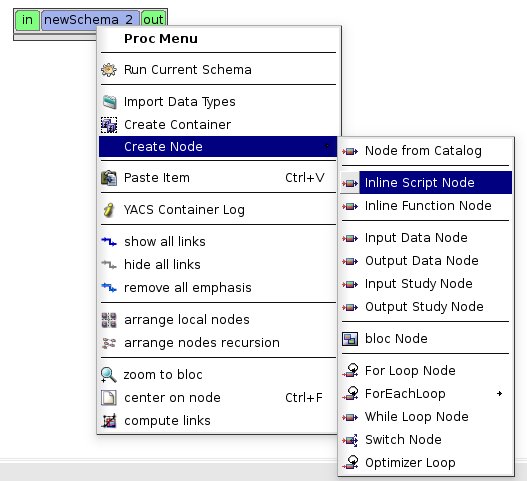
as a result:

Example of inline script node with ports
Now, if you want to modify the settings of this node, use the associated panel Property page for inline nodes.
SALOME service
This type of node can be created with help of Create Node -> Node from Catalog command from the Tree View context menu or from the 2D Viewer context menu.
The type of service node is chosen from the catalog of services available in the list of imported catalog, in the Catalogs Tree View.
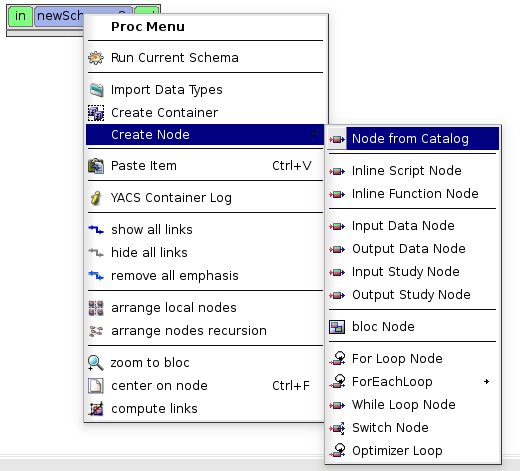
As a result of this command call the Input Panel with catalogs’ properties is displayed. The displayed property page provides a user with the possibility to choose firstly a catalog type: Current Session, Built In or other imported catalog (i.e. to fill catalog with types of nodes belonging to a predefined schema), and secondly - the type of node from the catalog to add it into the active schema. The Current Session catalog contains all SALOME components with its services.
Note
To add a node from catalog to the schema, drag and drop it. Multiple selection is possible in the Catalog, so you can add several nodes to the schema with one drag and drop.
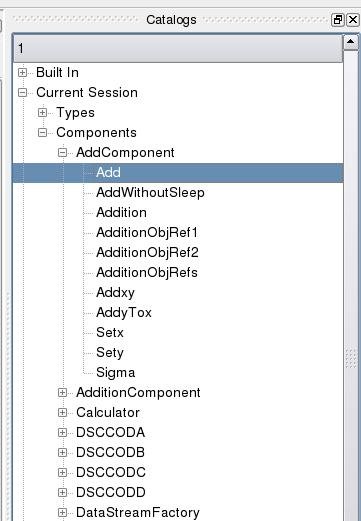
Create a node from current session catalog
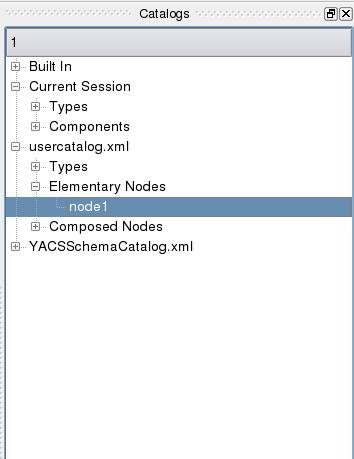
Create a node from a user catalog

Example of service node
As a result of SALOME service node creation from Current Session catalog, the content of schema Tree View is enlarged with data types used by the new node, a new node object under newSchema_1 folder, the corresponding SALOME component instance definition and a reference to a new created service node under it.
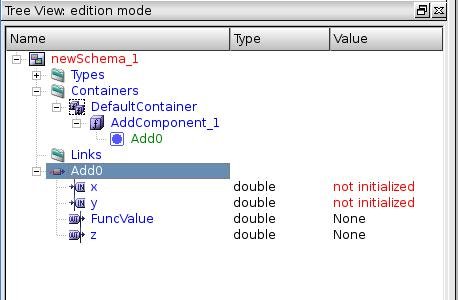
Tree View after SALOME service node creation
Now, if you want to modify the settings of this node, use the associated panel Property page for SALOME service.
Block
The node object can be created with help of Create Node –> bloc Node command from the Tree View context menu or from the 2D Viewer context menu.
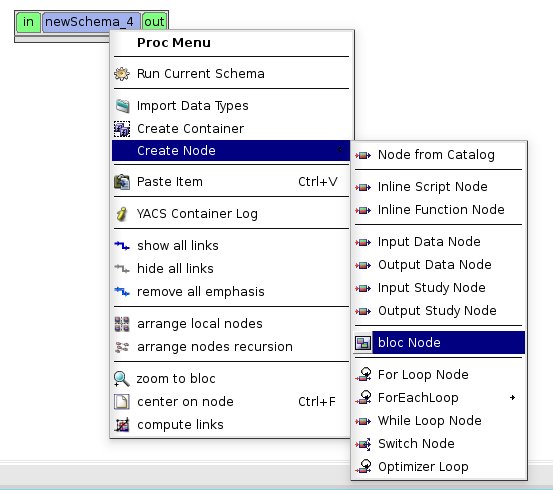
as a result:
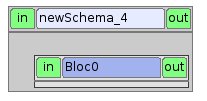
Empty Block node
Child nodes of a block node can be created with help of sub-items of Create Node command from block node context popup menu in the Tree View or in the 2D Viewer.
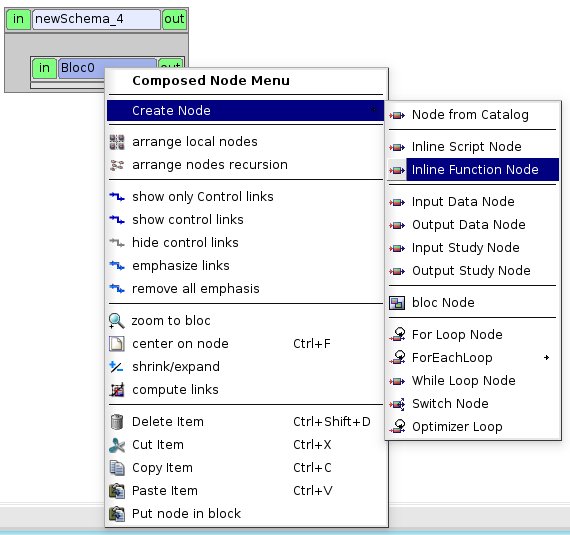
as a result:

Example of Block node with inline function node as a child node
For Loop
The node object can be created with help of Create Node –> For Loop Node command from the Tree View context menu or from the 2D Viewer context menu.
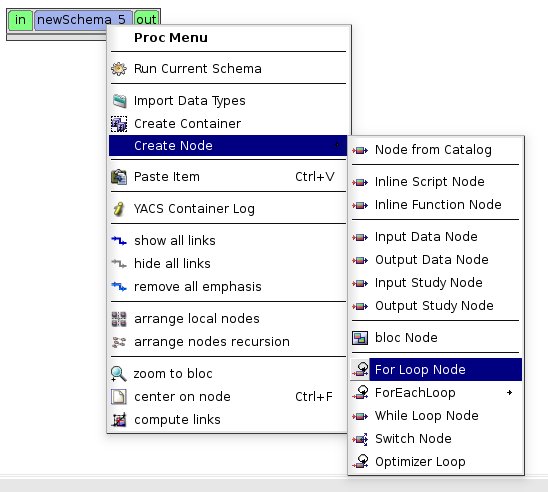
as a result:
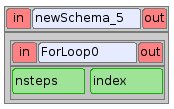
For Loop node without a body (i.e. newly created)
Body node of a For Loop node can be created with help of sub-items of Create Node command from For Loop node context popup menu in the Tree View or in the 2D Viewer.
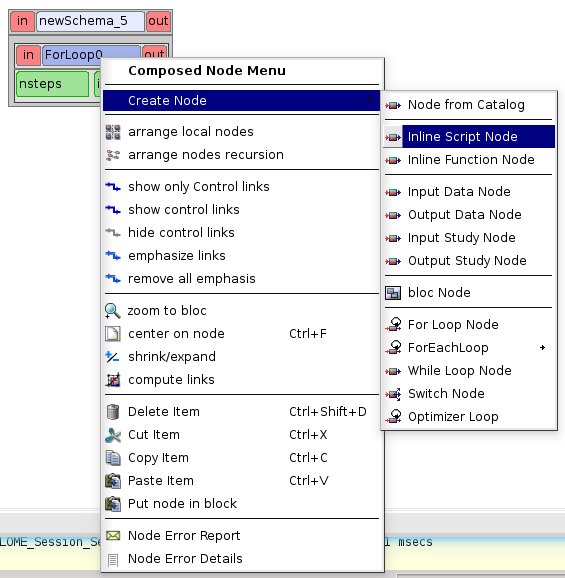
as a result:

For Loop node with inline script node as a body
ForEachLoop
The node object can be created with help of sub-items of Create Node –> ForEachLoop command from the Tree View context menu or from the 2D Viewer context menu. There is one sub-item for each data type known in the schema object. If you need another data type, you’ll have to import it in the schema. In this case we use a double data type as the main type of the loop.
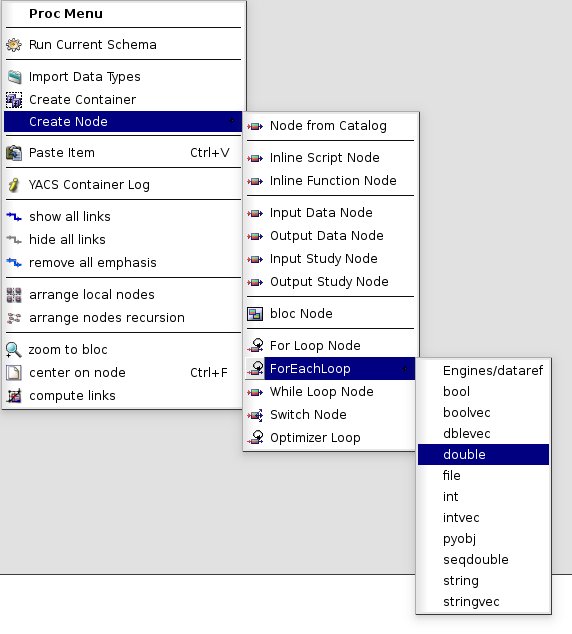
as a result:
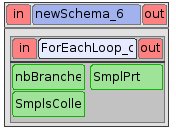
ForEachLoop (double) node without a body (i.e. new created)
Body node of a ForEachLoop node can be created with help of sub-items of Create Node command from ForEachLoop node context popup menu in the Tree View or in the 2D Viewer.
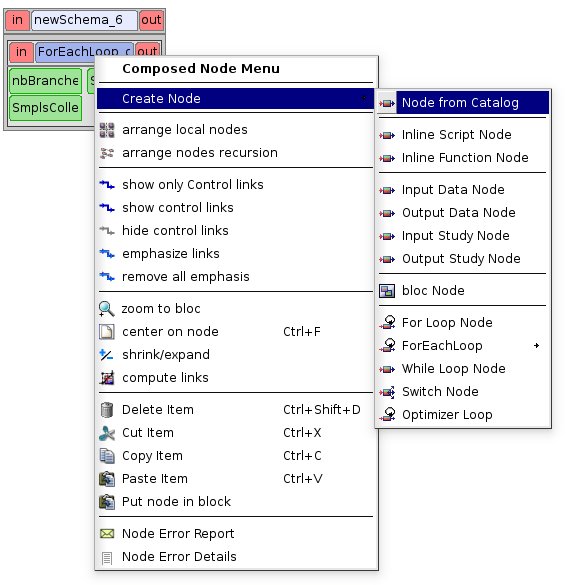
as a result:
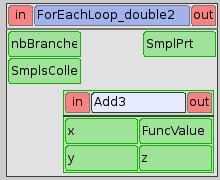
ForEachLoop node with SALOME service node as a body
While loop
The node object can be created with help of Create Node –> While Loop Node command from the Tree View context menu or from the 2D Viewer context menu.
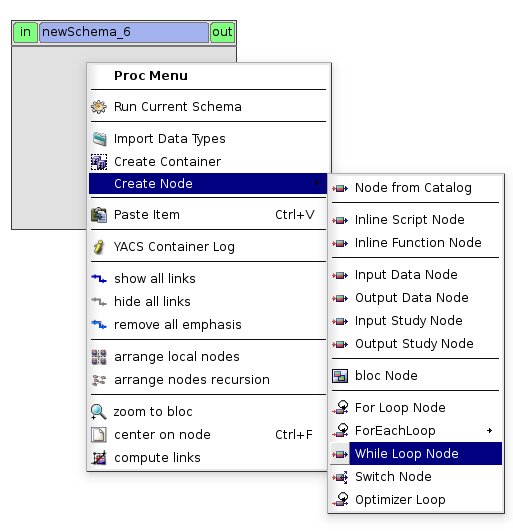
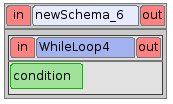
While loop node without a body (i.e. new created)
Body node of a While Loop node can be created with help of sub-items of Create Node command from While Loop node context popup menu in the Tree View or in the 2D Viewer.
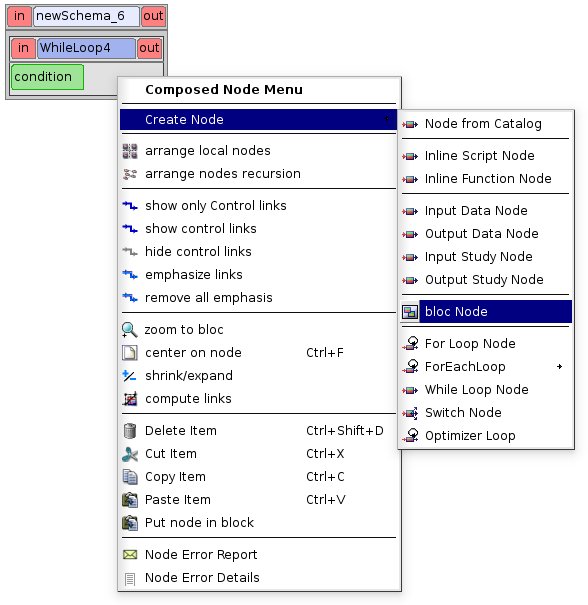
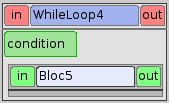
While Loop node with Block node as a body
Switch
The node object can be created with help of Create Node –> Switch Node command from the Tree View context menu or from the 2D Viewer context menu.
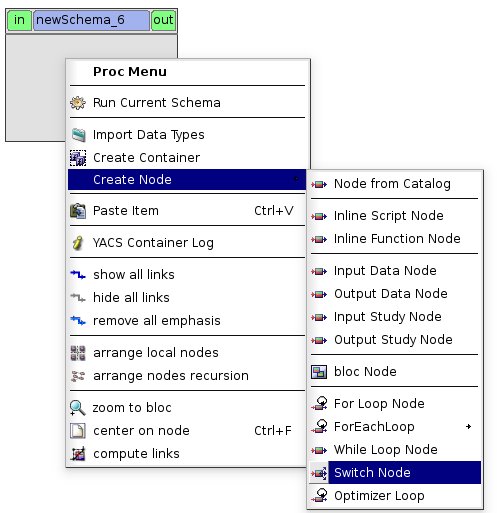
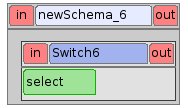
Switch node without any cases (i.e. new created)
Body node of a Switch node can be created with help of sub-items of Create Node command from Switch node context popup menu in the Tree View or in the 2D Viewer.
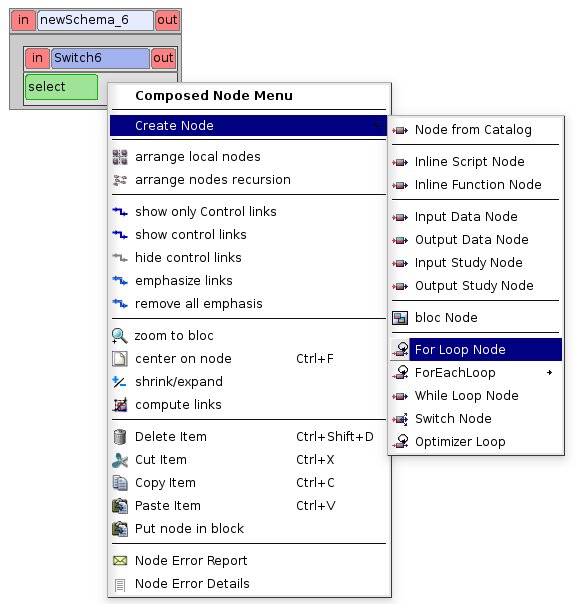
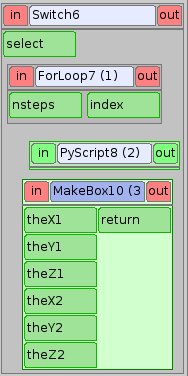
Switch node with three cases
The number of Switch node cases can be changed with help of functionality provided by the property page of Switch node (for the sample of the property page see Property page for Switch node section).
OptimizerLoop
The node object can be created with help of Create Node –> Optimizer Loop command from the Tree View context menu or from the 2D Viewer context menu.
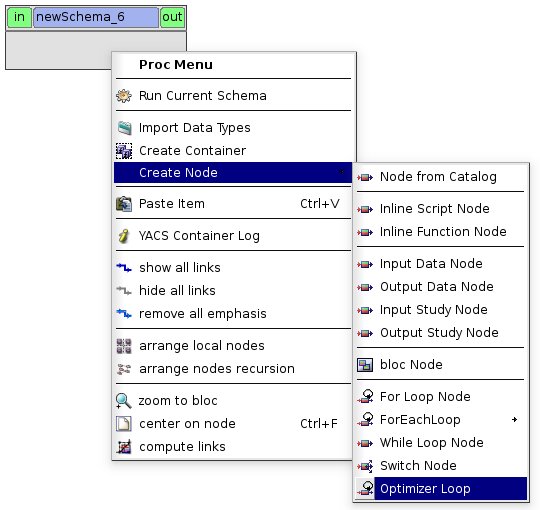
Body node of an Optimizer Loop node can be created with help of sub-items of Create Node command from Optimizer Loop node context popup menu in the Tree View or in the 2D Viewer.
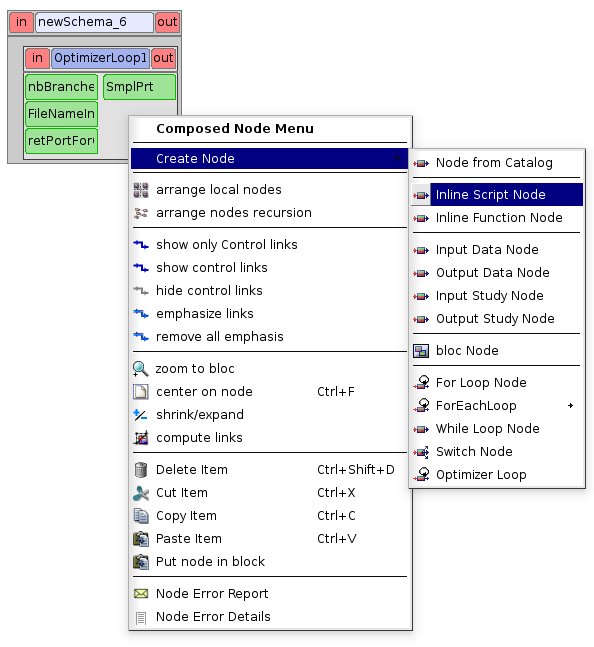
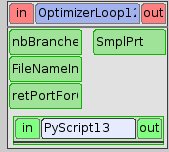
Optimizer Loop with one internal python node
The parameters of the Optimizer Loop can then be modified with help of the functionality provided by the property page of Optimizer Loop node (see Property page for Optimizer Loop section).
Input data node
The node object can be created with help of Create Node –> Input Data Node command from the Tree View context menu or from the 2D Viewer context menu.
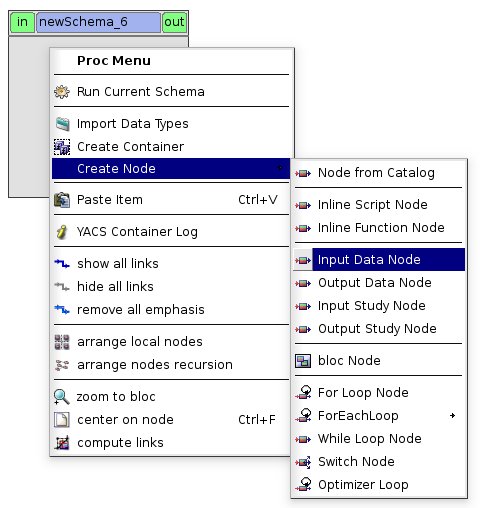
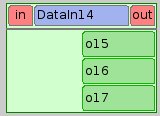
Input data node with sample ports
Output data node
The node object can be created with help of Create Node –> Output Data Node command from the Tree View context menu or from the 2D Viewer context menu.
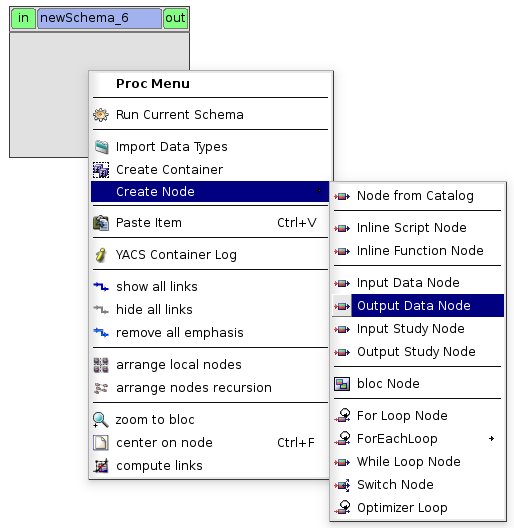
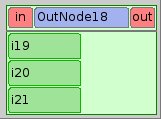
Output data node with sample ports
Input study node
The node object can be created with help of Create Node –> Input Study Node command from the Tree View context menu or from the 2D Viewer context menu.
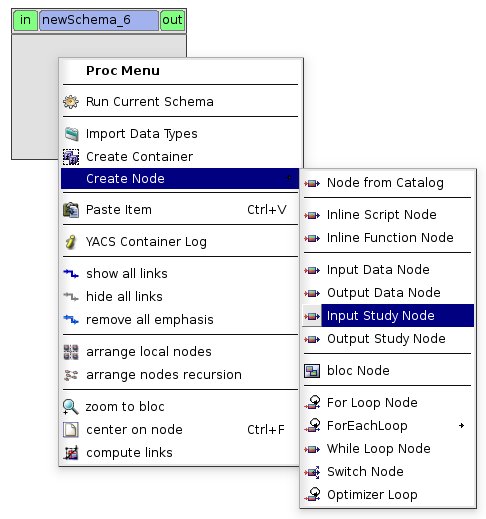
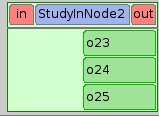
Input study node with sample ports
Output study node
The node object can be created with help of Create Node –> Output Study Node command from the Tree View context menu or from the 2D Viewer context menu.
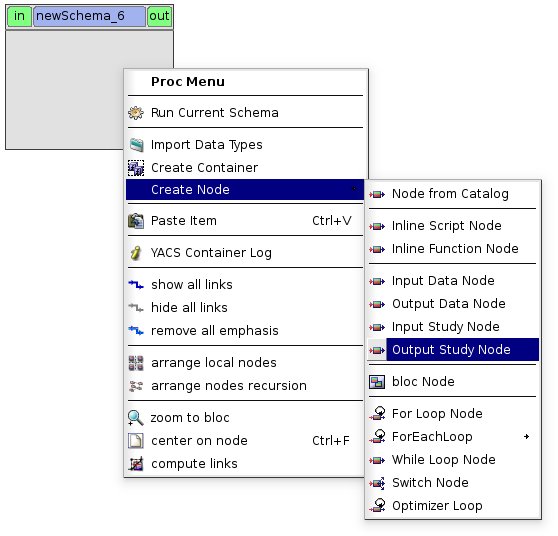
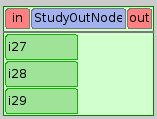
Output study node with sample ports
As a result of node creation, YACS module creates a new node object with a default name and shows it in the Tree View (under the proper parent item) and in 2D Viewer. For service nodes the reference to the created service node is also published under the corresponding component instance definition in the Tree View. For any node object type, the default name has a form of “node_subtypeNNN”, where NNN is the smallest integer that produces a unique node name not yet in use.
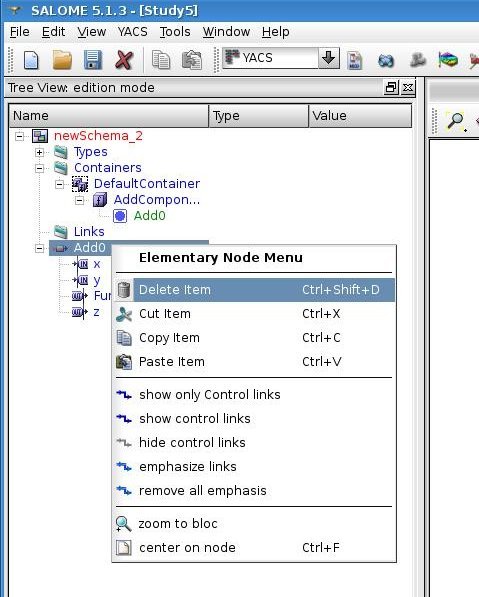
The user can delete the created node by choosing Delete command from node context popup menu in the Tree View or in the 2D Viewer (see Delete an object section).
Create a link
Connecting nodes ports by links means transferring data from output port to input port of a next node. So, in general, only output and input ports of different nodes can be connected by a link.
There are three types of links to connect nodes with each other in YACS GUI:
- data flow link (between data ports),
- data stream link (between stream ports),
- control link (between gate ports).
The color code of data links differs from the same one of stream links and is taken from the user preferences (see Set user preferences section).
The link creation can be performed only between nodes included into the same schema object. Therefore, in such a case the schema should contain at least two nodes.
The user can create a link by dragging the output port to connect and dropping it onto the input port. The action is the same for data flow, data stream and control link. The action of drag-and-drop can be done in the Tree View or in the 2D Viewer.
The input port is considered as the end of the newly created link. The output port is the beginning of the newly created link.
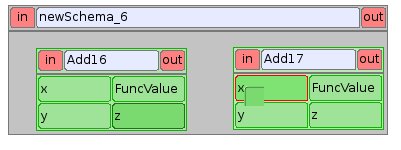
Drag-and-drop between Add16.z output port and Add17.x input port
It’s worth mentioning that there are two possibilities for the user to create data links with Drag-and-Drop:
- Add dataflow link : standard Drag-and-Drop creates a data link and adds a control link between concerned nodes simultaneously
- Add data link Drag-and-Drop with control key pressed creates a data link without adding a control link. This functionality is needed inside loop nodes. An example of such a data link is shown on the figure below.
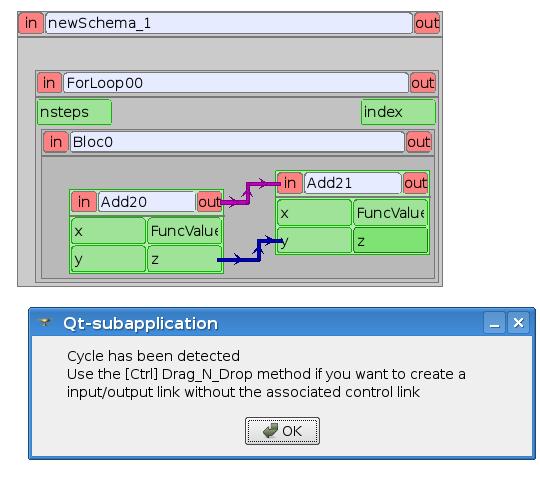
Trying to create a dataflow link between Add21.z and Add20.x with a loop
In such a case it is needed to separate the flow of data from the flow of control.
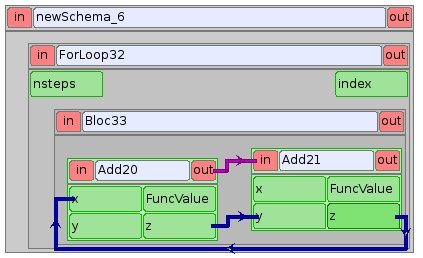
Create a simple data link with control key pressed
To create a control link the user should use Drag-and-Drop between output gate port and input gate port. The output gate port is considered as the beginning of the newly created control link, and the input gate port as the end of the link.
As a result of link creation, a valid link between ports is created. The link object is published in the Tree View in the Links folder under the corresponding schema object. The presentation of a new link is shown in the 2D Viewer and colored with the color code according to links’ type.
A new link object has a default name, which contains names of “from” and “to” nodes and ports and cannot be changed by the user (see description of link objects in the Tree View).
Each link has an associated property page that, in most cases, shows the link name. For datastream links (CALCIUM links), a properties editor allows to set and modify link properties (see Datastream links).
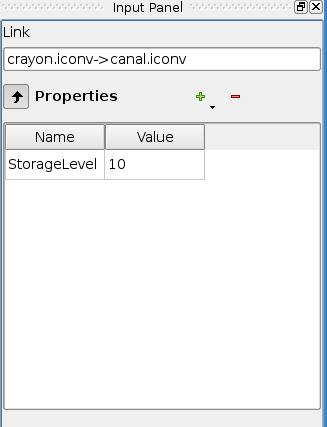
datastream link properties editor
The user can delete a link by choosing Delete command from link context popup menu in the Tree View or in the 2D Viewer (see Delete an object section).
Edit an object
The edition of an object is one of basic points of modification operations as the creation or deletion. The YACS GUI proposes the edition of an object with help of the Input Panel. For this purpose the user should select the object, which properties he wants to edit, in the Tree View or in the 2D Viewer.
As a result of this operation, Input Panel is updated and the property page of the selected object (and objects dependable from this one) is opened. Within the property page(s) the user can modify objects’ parameters by typing in corresponding input fields or selecting an item in combo box input fields.
The user confirm the modifications by pressing Apply button on the Input Panel. The Cancel Edition button can be used to cancel modifications that have not been already applied.
If the user finishes the edition process, YACS module updates (if it is necessary) Tree View and/or 2D representation of the modified object.
It’s worth mentioning that if the user selects something in the Tree View or 2D Viewer before applying the changes in the Input Panel, the object background color is changed to yellow to remind applying the changes.
Property page for container
The property page for container definition is shown on the figure below.
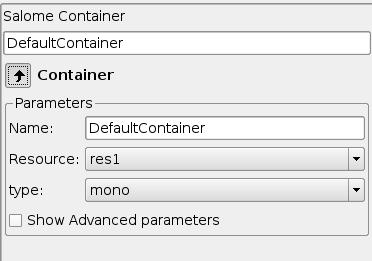
Container property page
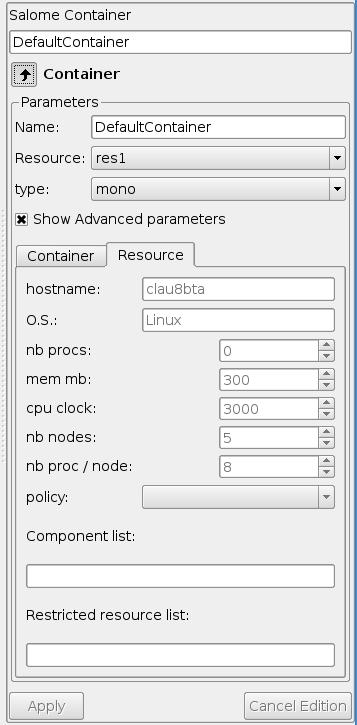
Container property page with advanced parameters shown
The property page for container allows to modify the name and a set of machine parameters of the selected container object. At the beginning, machine parameters are initialized with the default values. For most parameters, the default values can be used. The user can select a resource from a list obtained with help of SALOME resource manager or use the automatic option to let SALOME selects computers. The user can only modify resource parameters (Resource tab) when the automatic option has been choosen. In that case, resource parameters are constraints used by the resource manager to select the best resource for the container. In the other case (specific resource selected), the resource parameters come from the resource manager, are the effective ones and are only displayed.
The user can apply modifications to the selected container object by pressing Apply button. In such a case YACS module changes properties of the selected container definition according to new values from the Input Panel and updates the Tree View if it is needed. The Cancel Edition button can be used to cancel modifications that have not been already applied.
Property page for component instance definition
The property page for SALOME components is shown on the figure below.
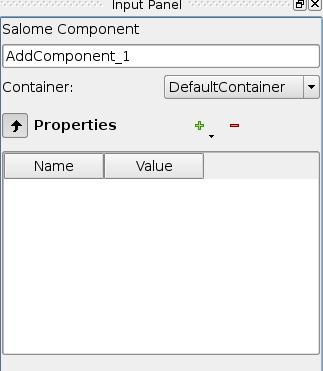
Property page for SALOME component instance definition
In the Input Panel for SALOME component instances the user can see the name of the selected component object. This field is not editable and use only to provide information about component name. It is also possible to change the associated container (container: combobox) and to add properties to the component instance. These properties are converted to environment variables when the schema is executed.
Property page for schema
The schema property page allows the user to specify the name of the schema.
The property page for schema is shown on the figure below.
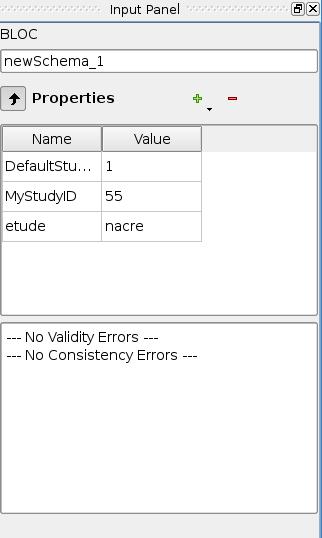
Property page for schema
It is possible to add properties to the schema. These are properties for all the nodes defined in the schema.
Property page for node
The content of the property page for node depends on the type of the node. Here are property page configurations for the different types of nodes.
Property page for inline nodes
The property pages for inline function and inline script nodes are shown on the figures below.
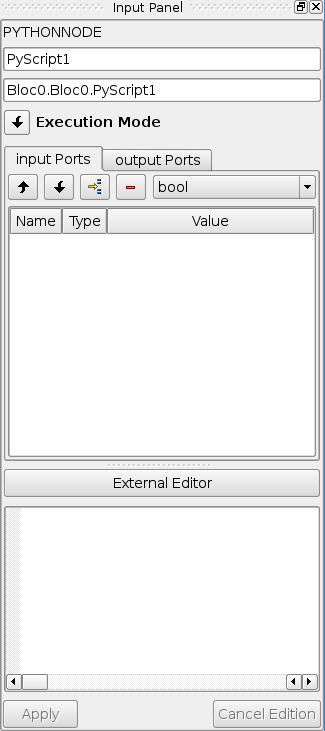
Property page for inline script nodes
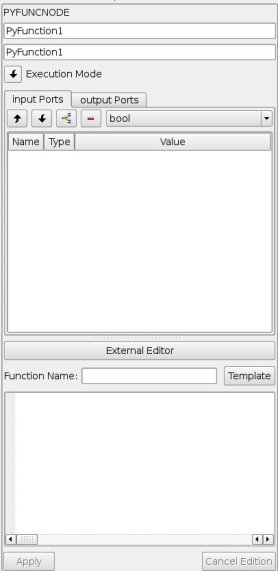
Property page for inline function nodes
The pages allow the user to:
- specify the name of the node,
- read the full name of the node (this field is read only and updated if the user changes the node name),
- change the list of input and output ports (it is possible to set port name, choose port type and value type from the corresponding combo boxes, set input values for input port, if it is not linked),
- change the name of the Python function (“Function Name” entry) to execute for Python function node only,
- enter or modify a source code of Python function or script in the built-in Python code editor (syntax highlighting, text selection, cut/copy/paste mechanism).
- generate a template of the python function with the Template button when all ports are defined and the function name is set.
- edit the python code with an external editor (External Editor button, if set in user preferences).
An inline node can be executed in a remote container by setting its execution mode to Remote and selecting a container in the containers list.
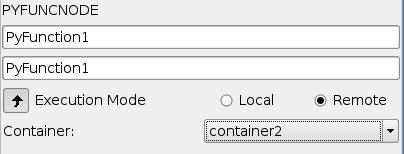
Property page for SALOME service
The property page for SALOME service nodes is shown on the figure below.
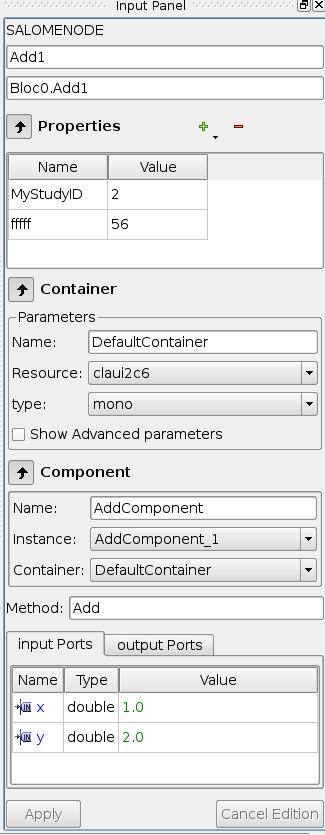
Property page for SALOME service nodes
The page allows the user to:
- change the name of the node,
- read the full name of the node (this field is read only and updated if the user changes the node name) and its type,
- read the name of the associated component instance,
- change the associated component instance by selecting it in the list of available component instance definitions in the current schema,
- change the associated container with help of built-in property page for component instance definition. The user selects it in the list of available container definitions in the current schema,
- change properties of the associated container (e.g. host name) with help of built-in property page for container,
- read the name of the method from the associated component, which will be executed by the node,
- change values of input ports, if it is not linked,
- change or add properties
Property page for Block node
The property page for Block node is shown on the figure below.
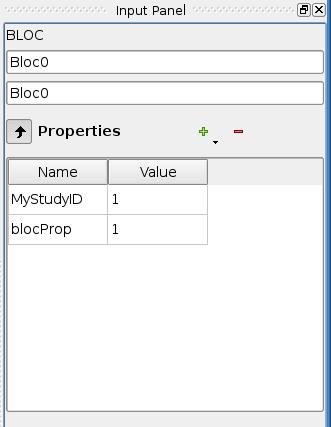
Property page for Block node
The page allows the user to :
- change the name of the node,
- read the full name of the node (this field is read only and updated if the user changes the node name),
- change or add properties. These are properties for all the nodes defined in the Block.
Property page for For Loop node
The property page for For Loop node is shown on the figure below.
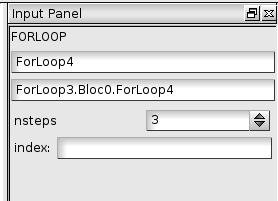
Property page for For Loop node
The page allows the user to:
- change the name of the node,
- read the full name of the node (this field is read only and updated if the user changes the node name),
- specify the value of the “nsteps” input port if it is not connected with a link,
Property page for ForEachLoop node
The property page for ForEachLoop node is shown on the figure below.
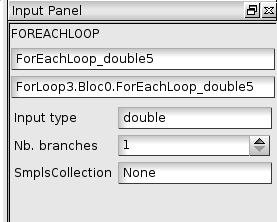
Property page for ForEachLoop node
The page allows the user to:
- change the name of the node,
- read the full name of the node (this field is read only and updated if the user changes the node name),
- read the input type of the loop (read only field),
- specify the value of the “nbBranches” input port if it is not connected with a link,
- specify the Sequence value of the “SmplsCollection” input port if it is not connected with a link,
Property page for While Loop node
The property page for While Loop node is shown on the figure below.
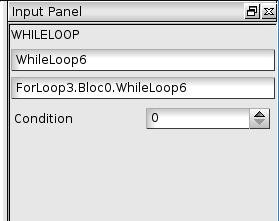
Property page for While Loop node
The page allows the user to:
- change the name of the node,
- read the full name of the node (this field is read only and updated if the user changes the node name),
- specify the Boolean value of the “condition” input port if it is not connected with a link,
Property page for Switch node
The property page for Switch node is shown on the figure below.
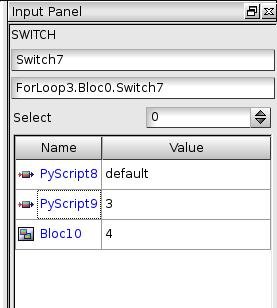
Property page for Switch node
The page allows the user to:
- change the name of the node,
- read the full name of the node (this field is read only and updated if the user changes the node name),
- specify the value of the “select” input port if it is not connected with a link,
- change the case value (integer or “default”) associated with child nodes.
Property page for Optimizer Loop node
The property page for Optimizer Loop node is shown on the figure below.
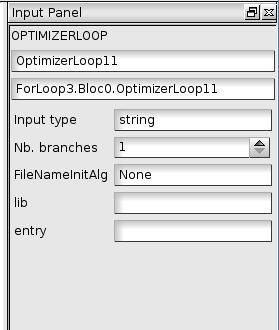
Property page for Optimizer Loop
The page allows the user to:
- change the name of the node,
- read the full name of the node (this field is read only and updated if the user changes the node name),
- read the input data type (this field is read only and updated if the user changes the plugin),
- change the number of branches
- change the plugin : parameters lib and entry
- change the initialization file : parameter FileNameInitAlg
Property page for Input Data node
The property page for Input Data node is shown on the figure below.
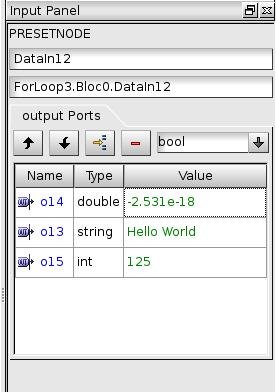
Property page for Input Data node
The page allows the user to:
- change the name of the node,
- read the full name of the node (this field is read only and updated if the user changes the node name) and its type,
- change the list of output ports (it is possible to set port name, choose port data type from the corresponding combo boxes, set values for output ports).
Property page for Output Data node
The property page for Output Data node is shown on the figure below.
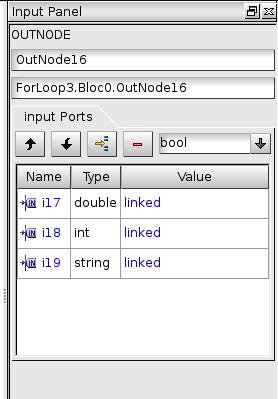
Property page for Output Data node
The page allows the user to:
- change the name of the node,
- read the full name of the node (this field is read only and updated if the user changes the node name) and its type,
- change the list of input ports (it is possible to set port name, choose port data type from the corresponding combo boxes).
Property page for Input Study node
The property page for Input Study node is shown on the figure below.
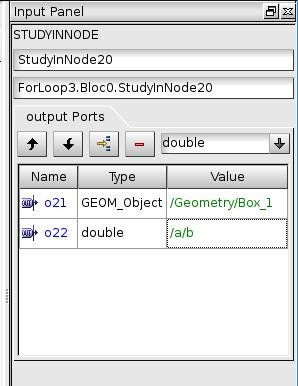
Property page for Input Study node
The page allows the user to:
- change the name of the node,
- read the full name of the node (this field is read only and updated if the user changes the node name) and its type,
- change the list of output ports. It is possible to set port name, choose port data type from the corresponding combo boxes, set values for output ports. The values must be SALOME study paths.
Property page for Output Study node
The property page for Output Study node is shown on the figure below.
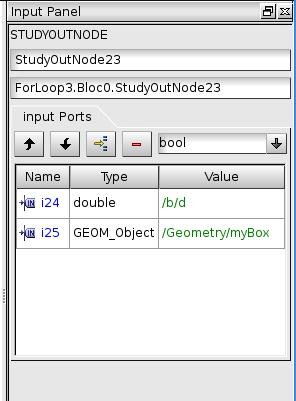
Property page for Output Study node
The page allows the user to:
- change the name of the node,
- read the full name of the node (this field is read only and updated if the user changes the node name) and its type,
- change the list of input ports. It is possible to set port name, choose port data type from the corresponding combo boxes and set values that must be SALOME study paths.
Delete an object
The user can remove one or several objects from the current study.
To perform this operation the user should select object to be deleted in the Tree View or in the 2D Viewer and activates Delete item from its context popup menu.
With help of context popup menu the user can delete the following objects:
- node,
- link.
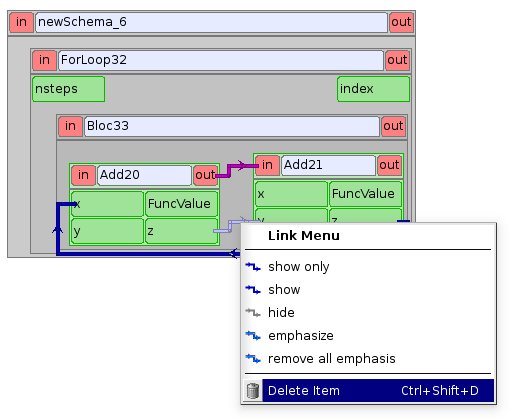
An example of link deletion using link context popup menu in the 2D Viewer
YACS module deletes the selected object with all sub-objects.
As the result of delete operation, the tree structure of the active schema in the Tree View and its representation in 2D Viewer are updated to reflect deletion of objects.
Input/output ports of inline nodes can also be deleted by the user with help of the Input Panel for this type of nodes (see the corresponding paragraph from Property page for node section).