To create a PipeTShape in the Main Menu select New Entity -> Primitives -> PipeTShape
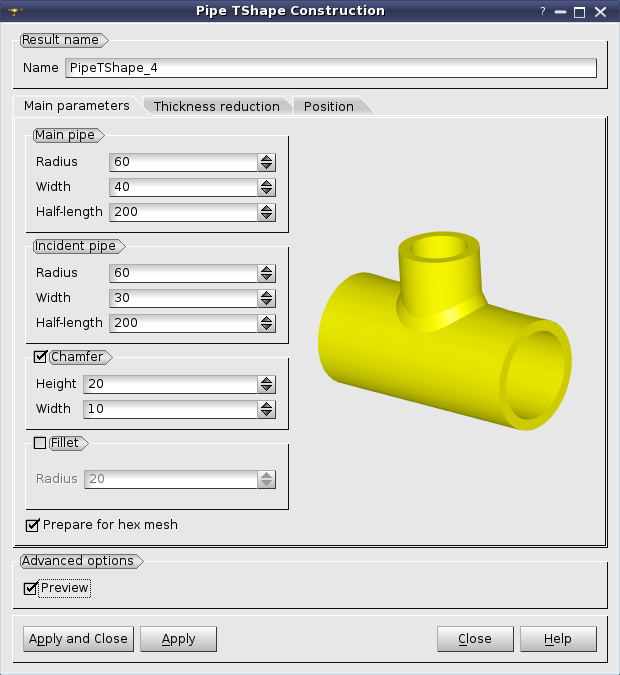
The dialog for definition of PipeTShape parameters and options is split into three tabs.
Main parameters:
-
Main pipe - allows defining the internal Radius, the Thickness and the Half-length (the distance between the end of the main pipe and the central axis of the incident pipe; the incident pipe is always located in the middle of the main pipe) for the main pipe.
-
Incident pipe - allows defining the internal Radius, the Thickness and the Length (the distance between the end of incident pipe and the central axis of the main pipe) for the incident pipe.
-
Chamfer - allows creating a chamfer at the junction of the main and the incident pipes. Its parameters are Height along the incident pipe and Width along the main pipe.
-
Fillet - allows creating a fillet at the junction of the main and the incident pipes by defining the fillet Radius.
-
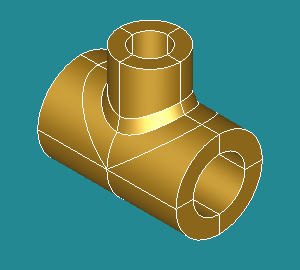
HexMesh - checkbox allows splitting the shape into blocks suitable for hexahedral mesh.
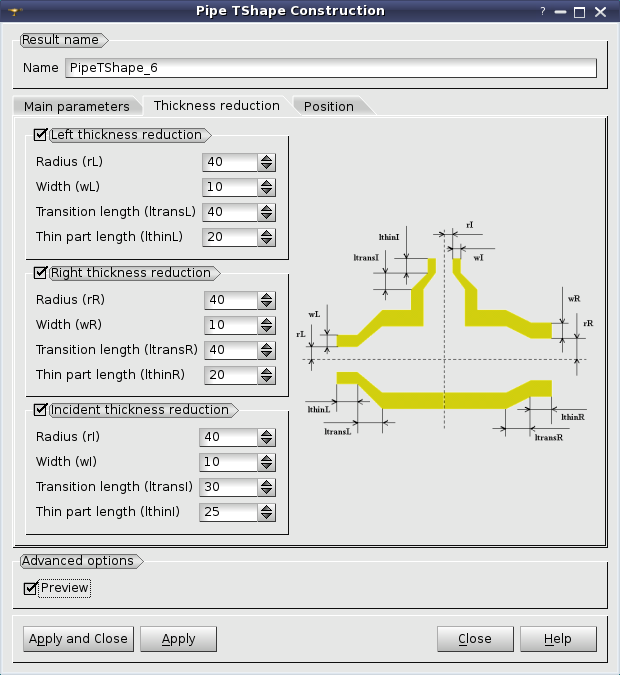
Thickness reduction
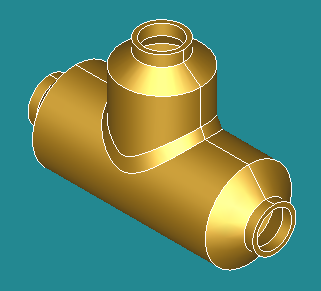
This tab allows applying, if necessary, thickness reductions at the open ends of the T-shape pipe (two ends of the main pipe and one end of the incident pipe). For each end it is possible to define:
-
Radius - is the radius of the reduced pipe.
-
Width - is the width of the reduced pipe.
-
Transition length - is the length of transition between the pipe and the reduced pipe.
-
Thin part length is the length of the reduced pipe.
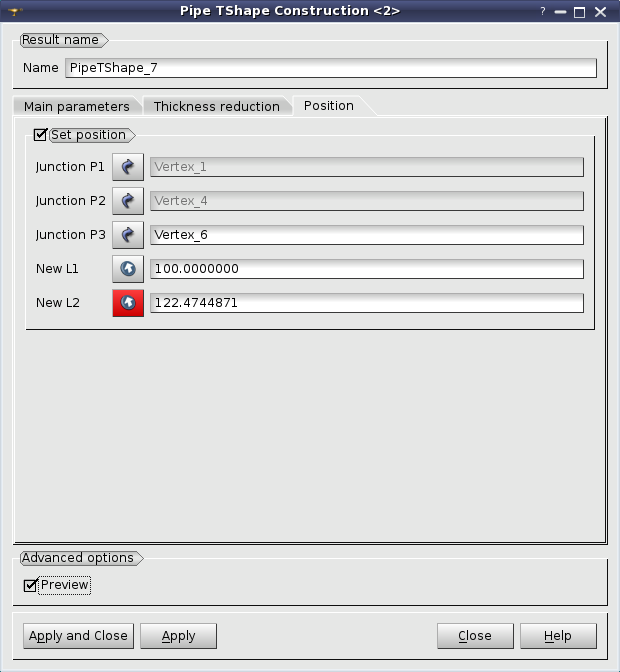
Position
By default the PipeTShape is created at the center of coordinates and oriented by XY (main pipe) and XZ (incident pipe) axes, but it is possible to define a custom Position.
-
Junction P1 and Junction P2 - are the end points of the main pipe (lying on its central axis).
-
Junction P3 - is the end point of the incident pipe.
The New L1 and New L2 values are calculated automatically, but should be confirmed by clicking the corresponding "Arrow" button.
-
New L1 - is the Half-length of the main pipe.
-
New L2 - is the length of the incident pipe. The Radius and Width of pipes are taken from the Main parameters tab.
Advanced options: Preview - displays the resulting shape in the viewer before Apply command.
Specify the parameters of the PipeTShape object in the opened dialog box and press "Apply" or "Apply & Close" button. The result of the operation will be a GEOM_Object.
TUI Commands:
There are three different TUI commands for PipeTShape creation:
-
geompy.MakePipeTShape - creates a standard PipeTShape.
-
geompy.MakePipeTShapeChamfer - creates a PipeTShape with a chamfer at the junction.
-
geompy.MakePipeTShapeFillet - creates a PipeTShape with a fillet at the junction.
The following arguments can be used with these commands:
- R1 - Radius of the main pipe.
- W1 - Thickness of the main pipe.
- L1 - Length of the main pipe.
- R2 - Radius of the incident pipe.
- W2 - Thickness of the incident pipe.
- L2 - Length of the incident pipe.
- HexMesh - If True, the shape is split into blocks (suitable for hexahedral mesh).
- P1 - First junction point of the main pipe (GEOM Vertex).
- P2 - Second junction point of the main pipe (GEOM Vertex).
- P3 - Junction point of the incident pipe (GEOM Vertex).
- H - Height of the chamfer along the incident pipe (used only with geompy.MakePipeTShapeChamfer command).
- W - Width of the chamfer along the main pipe (used only with geompy.MakePipeTShapeChamfer command).
- RF - Radius of the fillet (used only with geompy.MakePipeTShapeFillet command).
- theRL - Internal radius of left thickness reduction.
- theWL - Width of left thickness reduction.
- theLtransL - Length of left transition part.
- theLthinL - Length of left thin part.
- theRR - Internal radius of right thickness reduction.
- theWR - Width of right thickness reduction.
- theLtransR - Length of right transition part.
- theLthinR - Length of right thin part.
- theRI - Internal radius of incident thickness reduction.
- theWI - Width of incident thickness reduction.
- theLtransI - Length of incident transition part.
- theLthinI - Length of incident thin part.
Our TUI Scripts provide you with useful examples of creation of Advanced objects.
